Assistant Settings
In this section
The "Settings" section allows you to configure various general settings for your virtual assistant.
This section is accessible by opening your assistant's menu (the three dots at the top right of the card) and selecting "Settings".
General Assistant Settings
The "Assistant" section allows you to customize some information related to your assistant.

The first part of the section allows you to customize:
-
assistant name
info- This name will be used in case of the @@BOT_NAME@@ placeholder
-
assistant language
info- The assistant language is defined during assistant creation and cannot be modified later.
-
assistant gender
-
assistant voice
-
assistant description
info- The assistant description will not be displayed to end users, but only within the Algho platform.
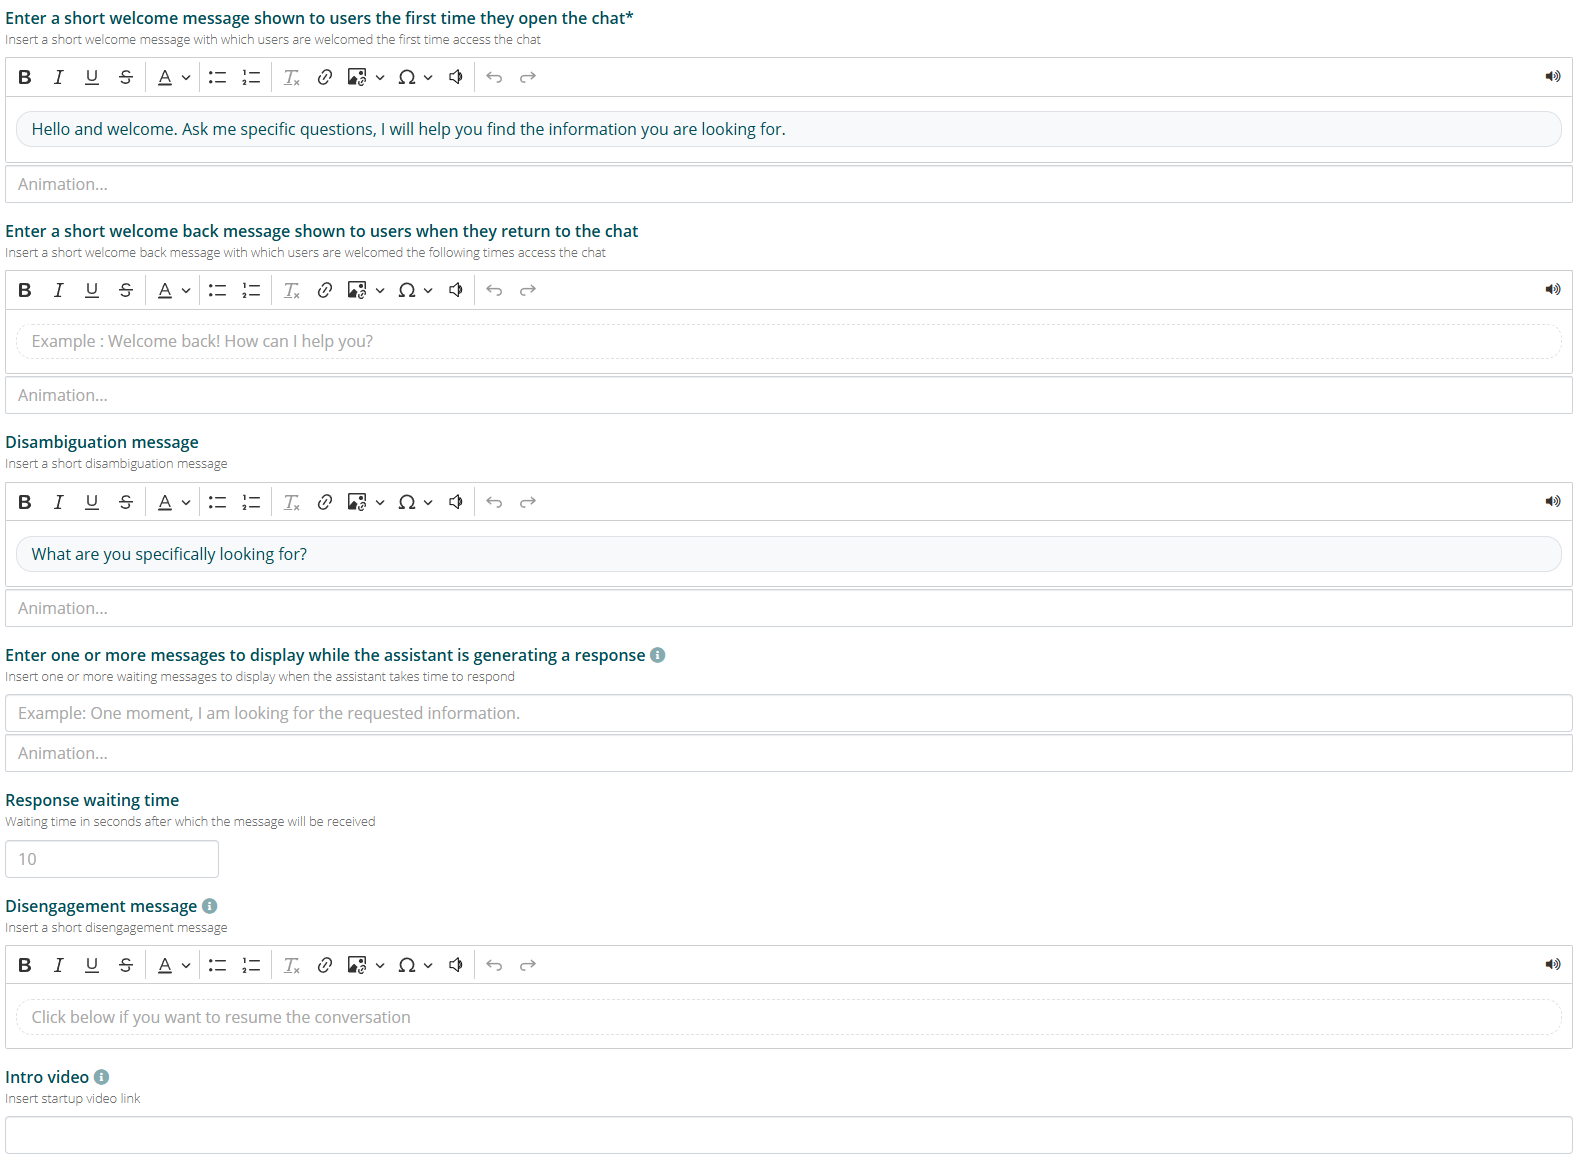
The second part allows you to customize some messages that the assistant will display in specific situations.
The "welcome message" is shown the first time a user interacts with the virtual assistant. This message is not displayed in subsequent interactions, unless the user has cleared the cookies of the website where the assistant is located.
- If no welcome message is set, the default message "Hello and welcome. Ask me specific questions, I will help you find the information you are looking for." will be displayed.
The "welcome back message" is shown on subsequent occasions when users interact with the virtual assistant, unless the user has cleared the cookies of the website where the assistant is located.
The "disambiguation message" is shown when the virtual assistant responds in disambiguation mode, i.e. when it is not sure about the answer to provide to the user and offers suggestions extracted from the knowledge base.
- If no disambiguation message is set, the default message "Could you help me better understand what you are interested in? Choose from these options" will be displayed.
The "disengagement message" is shown only in the case of a Kiosk interface, when the user has left the conversation with the assistant.
The "initial video" is shown only in the case of a Kiosk interface, and is played before the welcome message.
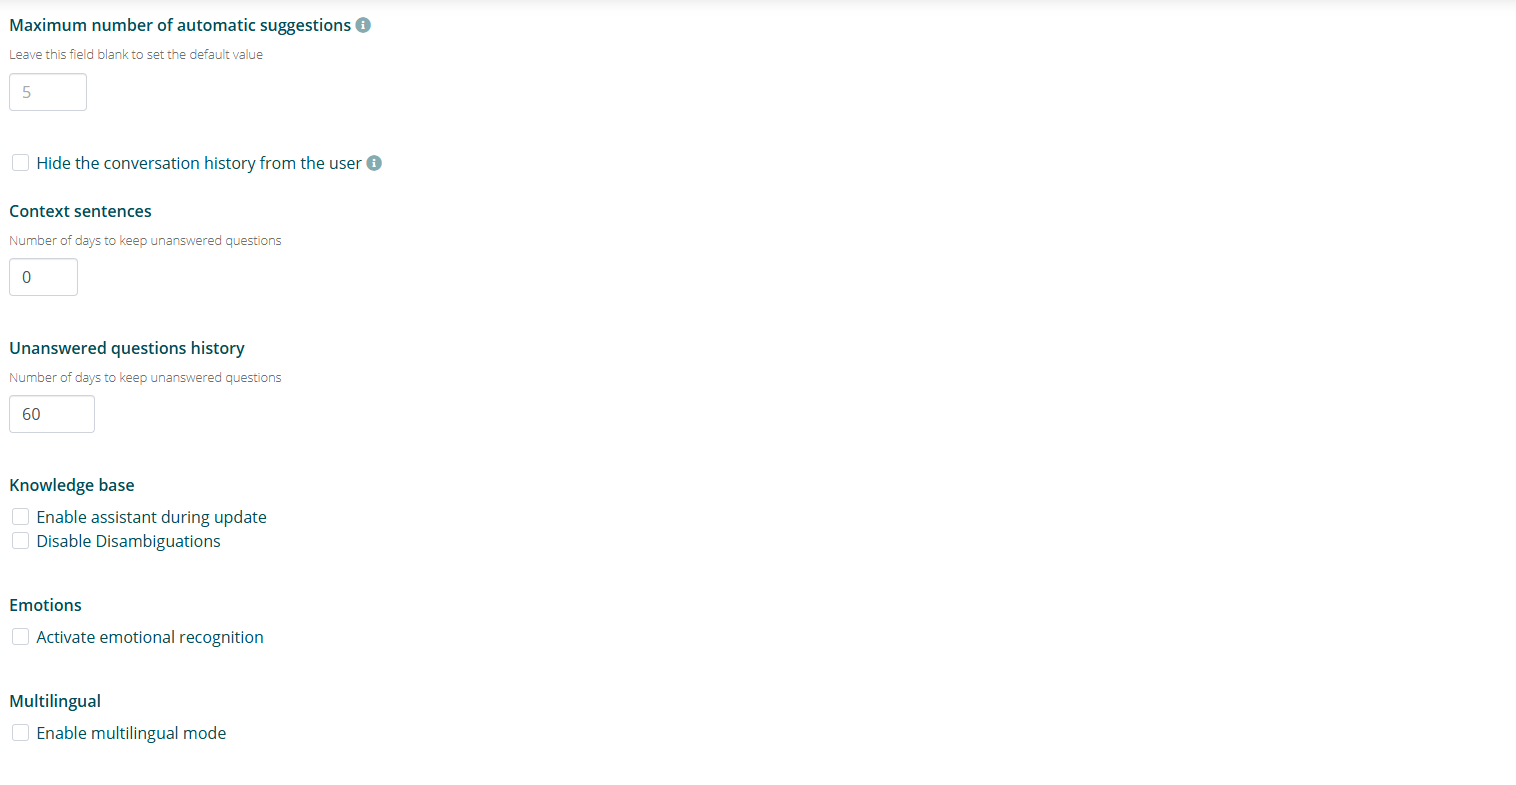
The third part allows you to customize some settings regarding the assistant's behavior in certain situations.
The "maximum number of automatic suggestions" sets the maximum number of suggestions that can be shown after a response that includes automatic suggestions.
The "hide conversation history from the user" option allows the conversation to start from the welcome message every time the user interacts with the assistant again.
- Enabling this option will disable the welcome back message, if set.
The number of "context sentences" determines how many user messages should be considered as conversation context. Here is an example of a conversation with active context:
- USER: How do I request an ID card?
- ASSISTANT: The ID card must be requested by appointment.
- USER: How much does it cost? (context: ID card)
- ASSISTANT: The ID card costs €5.
In the example above, the second user message did not contain the information "ID card"; thanks to the context, however, the assistant was still able to respond coherently.
The "unanswered questions history" option allows you to set after how many days unanswered user questions should be automatically deleted. The default number of days is 60.
The "enable the assistant during updates" option allows the assistant to answer user questions even during a mass update (i.e. via Excel) of its knowledge base. If this option is left disabled, during mass updates the assistant will respond with the default phrase "My information is being updated. Please try again later."
The "disable disambiguations" option prevents the assistant from responding with a disambiguation, replacing it with a courtesy response.
The "enable emotional recognition" option is only available if your Algho license includes the Emotional Module. Enabling this option allows the use of various features:
- the assistant will be able to analyze users' emotions while they interact with it
- the assistant's responses can be targeted based on the emotion detected during interaction
- the conversation history and assistant statistics will contain data regarding emotional analysis
After making the necessary changes, select "save" at the bottom right to avoid losing the changes made.
Interface and Digital Human
Interface
The "interface" section allows you to customize the chat interface through which users will interact with the virtual assistant, as well as some virtual assistant information.
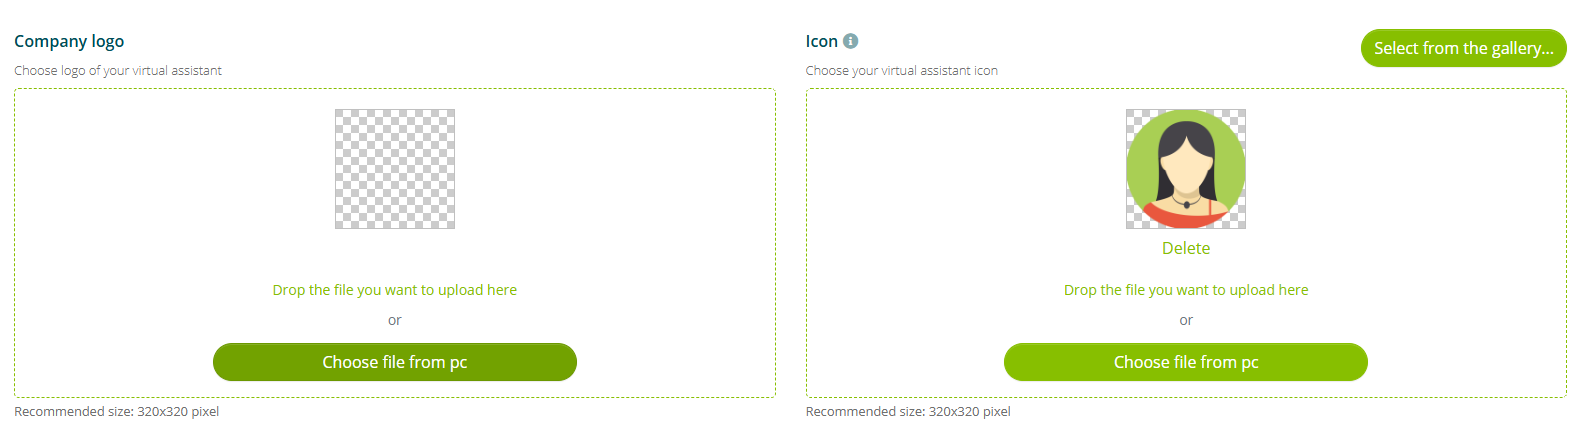
The first part allows you to customize the company logo and the virtual assistant icon. The recommended size for both images is 320×320 pixels.
These two images will not be displayed to end users, but only within the Algho platform.
The second part allows you to customize the appearance of the assistant chat, and the speed at which the assistant will respond to questions.
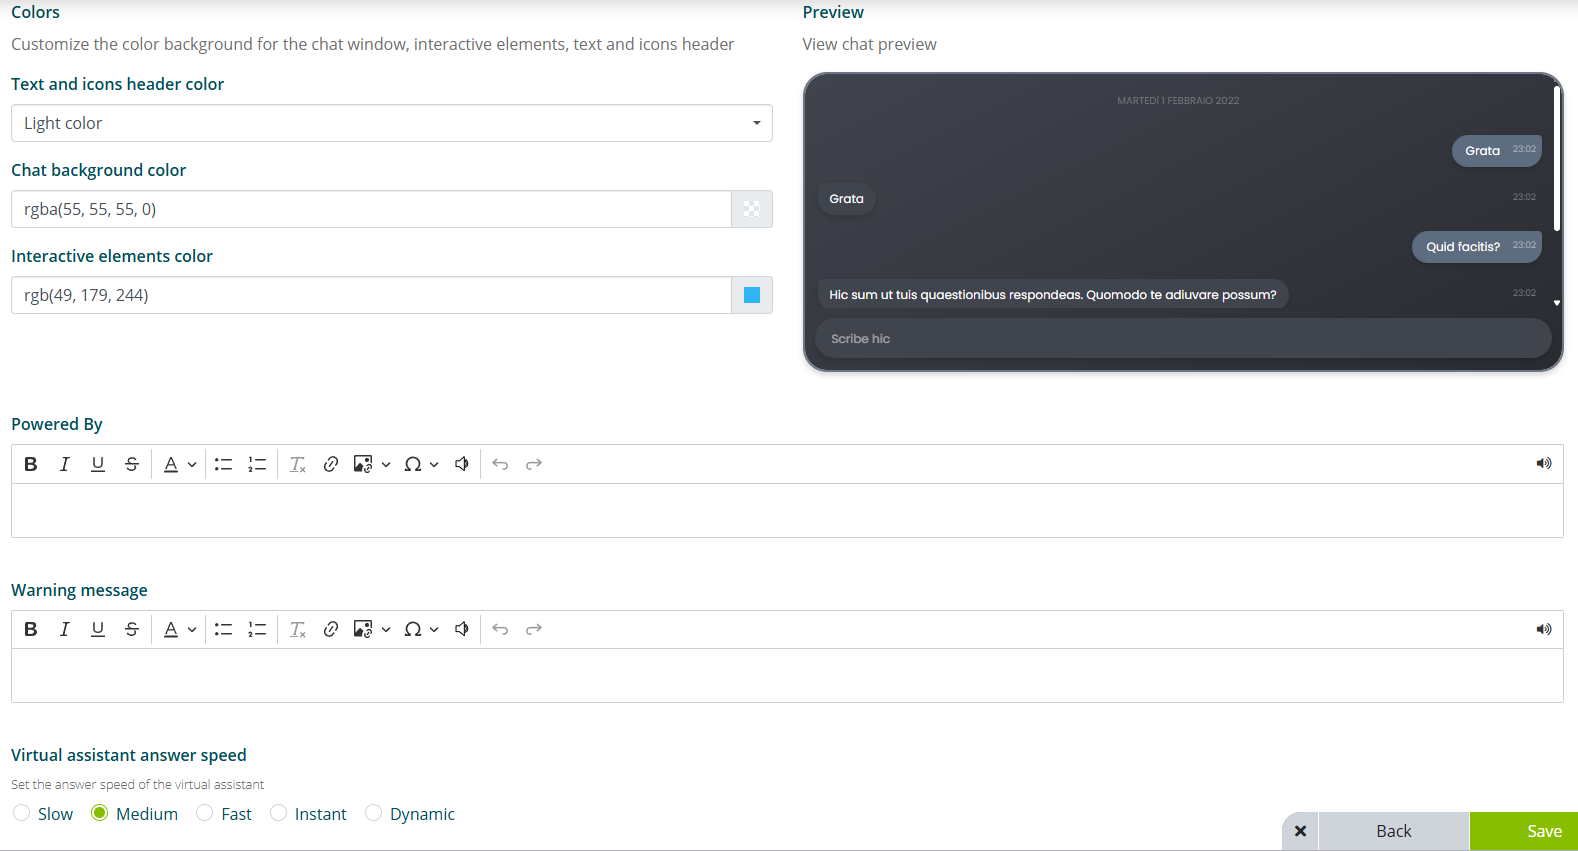
The "colors" section allows you to customize the chat colors. Specifically, you can customize:
-
text and icon color in the header, allows you to customize the color of the text and the color of the chat menu icons. Only light color and dark color are available.
infoThis option will be reset every time the background color or the interactive elements color is changed.
Changing this option will also reset the background color and the interactive elements color.
-
chat background color, allows you to customize the chat background color. You can choose the color from the palette or by entering the RGBA code.
-
interactive elements color, allows you to customize the color of some text elements such as the "X" to close the menu and the "V" to close the assistant chat.
The "powered by" section allows you to insert custom text at the bottom of the chat interface, above the text box. The text can be customized with standard formatting.
The "virtual assistant response speed" option allows you to customize the speed at which the virtual assistant responds to user questions. The available options are:
- slow, the assistant responds slowly to user questions, regardless of the length of the response.
- medium, the assistant responds faster than the previous option to user questions, regardless of the length of the response.
- fast, the assistant responds even faster than the previous option to user questions, regardless of the length of the response.
- dynamic, the assistant speed varies dynamically based on the length of the response.
Digital Human
The "digital human" section allows you to customize the appearance of your Digital Human and the background behind it.
This section is only available for Algho accounts that include a Digital Human.
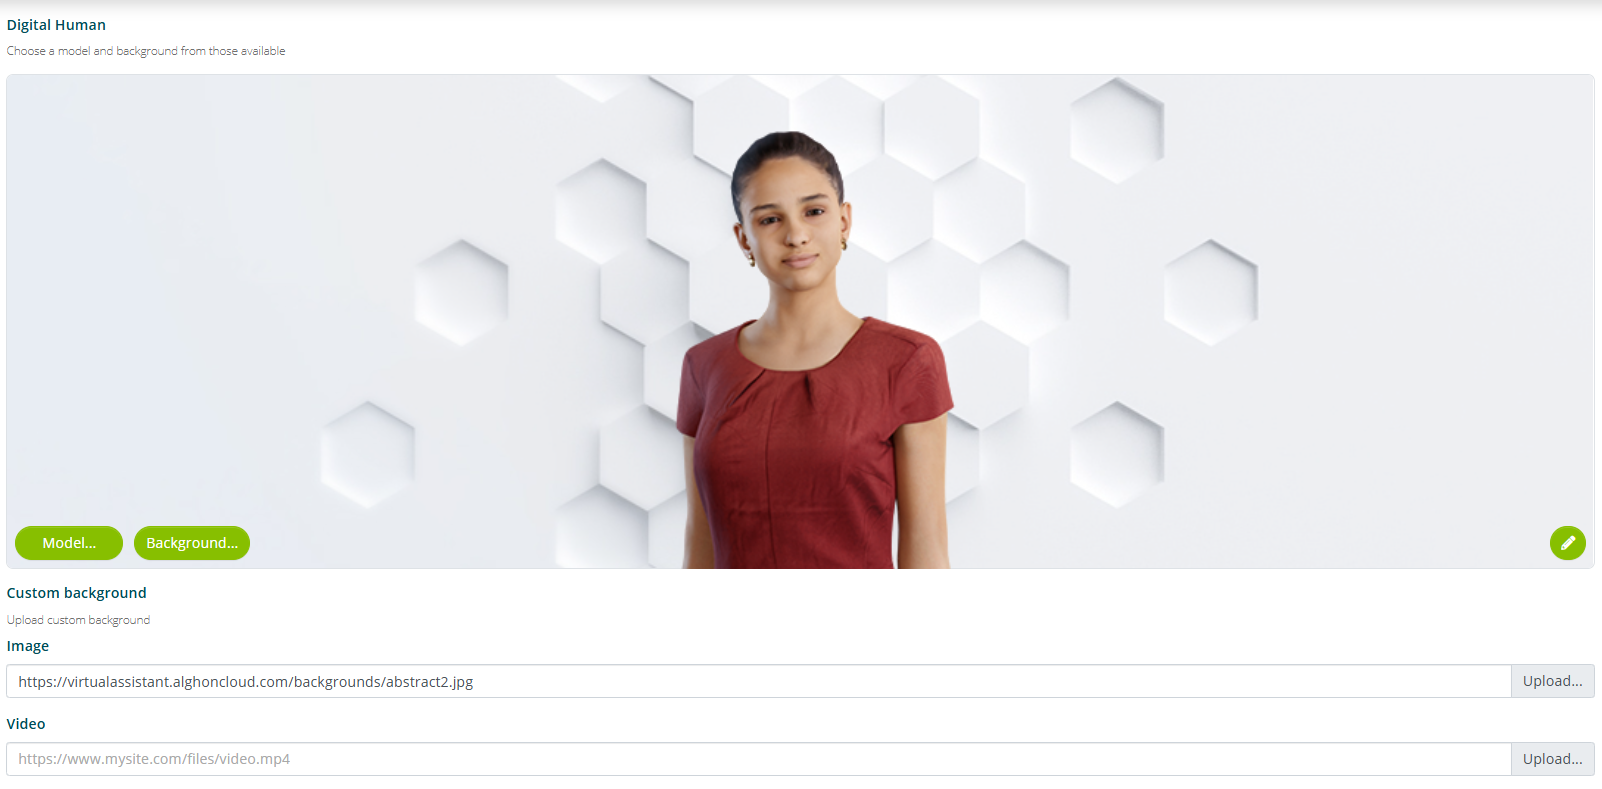
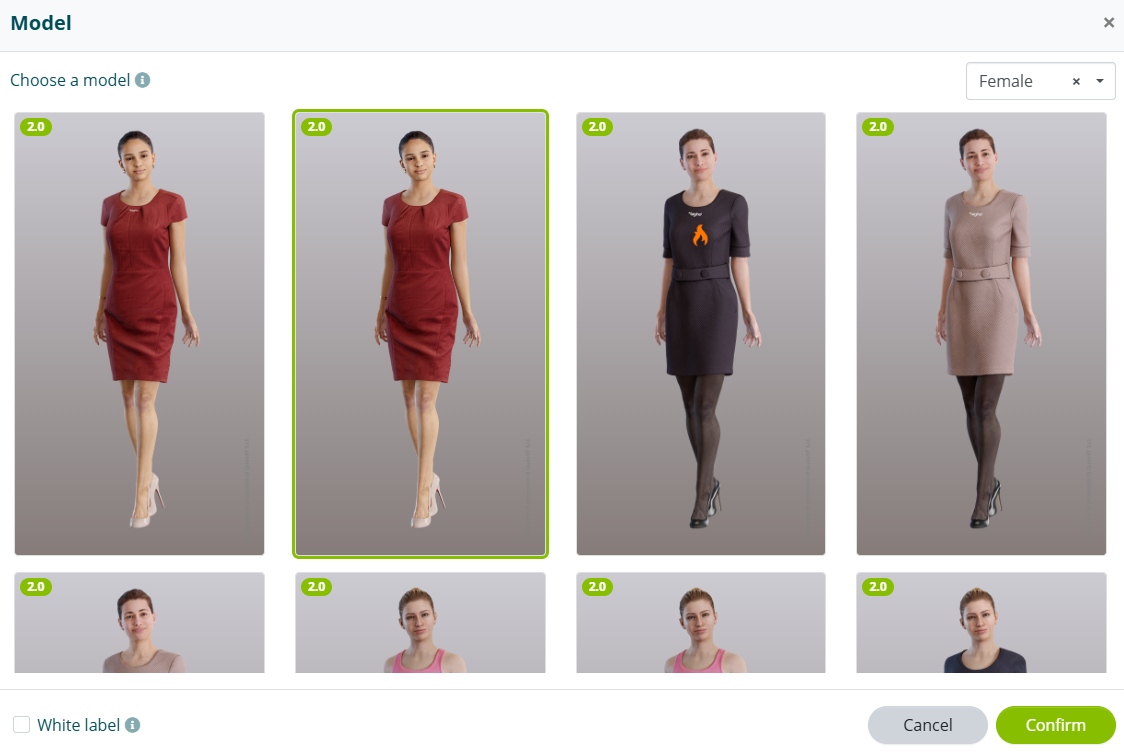
By selecting the "model" option you can choose your preferred Digital Human from the available catalog.
After selecting a model, you can click the edit icon on the right of the preview to customize some display aspects of the Digital Human, such as the light source, zoom and camera rotation (see Digital Human Editor).
By selecting the "background" option you can choose your preferred background from the available catalog. Alternatively, you can upload or link via URL an image or video to use as a custom background.
The selected or uploaded background will be displayed only when the user interacts with the assistant through the Digital Human Interface.
Digital Human Editor
The Digital Human Editor is the tool integrated in Algho to configure the appearance, positioning, lighting and animations of the virtual avatar.

Positions
The two values that initially determine the size of the avatar are the height (Avatar) and the camera position.
The Avatar parameter refers to the height: if the parameter increases, the avatar lowers; if it decreases, the avatar rises. The Camera parameter indicates the zoom, i.e. how much to bring the avatar closer or further away, and can also be managed with the mouse wheel.
The FOV (Field Of View) controls the width of the camera's field of view. Low values produce a zoom effect (closer view), high values produce a wider and more panoramic view.
Preview Grid
Enables or disables the display of a reference grid in the editor, useful for accurately aligning and positioning objects in the scene.
Preset
- Name: Allows you to select a preset.
- Rotate: Adjusts the rotation of the selected element along the configured axis. The value is expressed in degrees.
Tone Mapping
- HDR (High Dynamic Range): Manages the dynamic range of the scene, influencing brightness, contrast and overall color rendering. Allows a more realistic representation of bright lights and shadows.
Light
- Light Settings: Section dedicated to configuring light sources. Includes parameters such as intensity, direction and color of light to define the scene lighting.
Shadow
- Enable: Turns on or off the generation of shadows in the scene.
- Ground Plane: Enables a reference plane onto which object shadows are projected. Improves the perception of depth and realism.
LUT (Look-Up Table)
- File Cube: Allows you to select a LUT file (.cube) to apply a specific color correction to the scene.
- Intensity: Adjusts the intensity of the applied LUT effect. Low values produce a lighter effect, high values a more pronounced effect.
Breath
Activates a breathing animation on the avatar. Introduces micro-movements to make the behavior more natural and realistic.
Smile
Activates the avatar's smile animation, contributing to greater visual expressiveness.
Talking
Adjusts the intensity of the animation associated with speech (lip movement and micro-expressions). Higher values produce a more pronounced animation.
Waiting
Defines the avatar's behavior during idle state. Controls the presence and intensity of idle animations to keep the character visually active.
Lipsync
- Engine: Selects the lipsync engine used to animate the avatar's lip movement. Different options offer different levels of stability, precision and naturalness.
- Weight: Adjusts the overall intensity of the lipsync effect. Higher values make the lip movement more pronounced, lower values produce a more discreet effect.
- Delay: Introduces a time delay between the audio and the lip animation, useful for synchronizing lipsync in the presence of audio latencies.
- Lower Face Strength: Controls the intensity of movements in the lower part of the face (mouth, jaw). Higher values make the animations more pronounced.
- Upper Face Strength: Adjusts the intensity of micro-expressions in the upper part of the face (cheeks and surrounding areas). Helps improve realism during speech.
- Head Gesture: Enables or disables head movements synchronized with speech, to make the animation more expressive and natural.
- Audio Sync: Activates automatic synchronization between audio and lip animation. It is recommended to keep it active for consistent alignment between voice and movement.
Additional Animations
- Additional: Allows you to select an additional set of predefined animations to apply to the avatar, including stylistic or behavioral variations (e.g. specific presets for context or character type).
Modify Avatar Size
The avatar size can be modified from the Digital Human section, accessible by clicking on the avatar name, then on Settings and finally on Digital Human in the options bar. In the avatar window, click the small green pencil at the bottom right to open the editing menu.
The first parameter to select (Mode) is the type of medium on which the avatar is integrated:
- Desktop: avatar in full-screen 3D version
- Embed: avatar integrated on the website
- Mobile: avatar integrated on your mobile phone
- Kiosk: avatar integrated on the totem/kiosk
- App: avatar integrated on a specific app
Live Chat and Call to Action
Live Chat
The "Live chat" section allows you to customize the messages that will be sent to the user in various situations related to the Live Chat with a human operator (see also Live Chat).
This section is available even if your assistant does not include contact with a human operator.
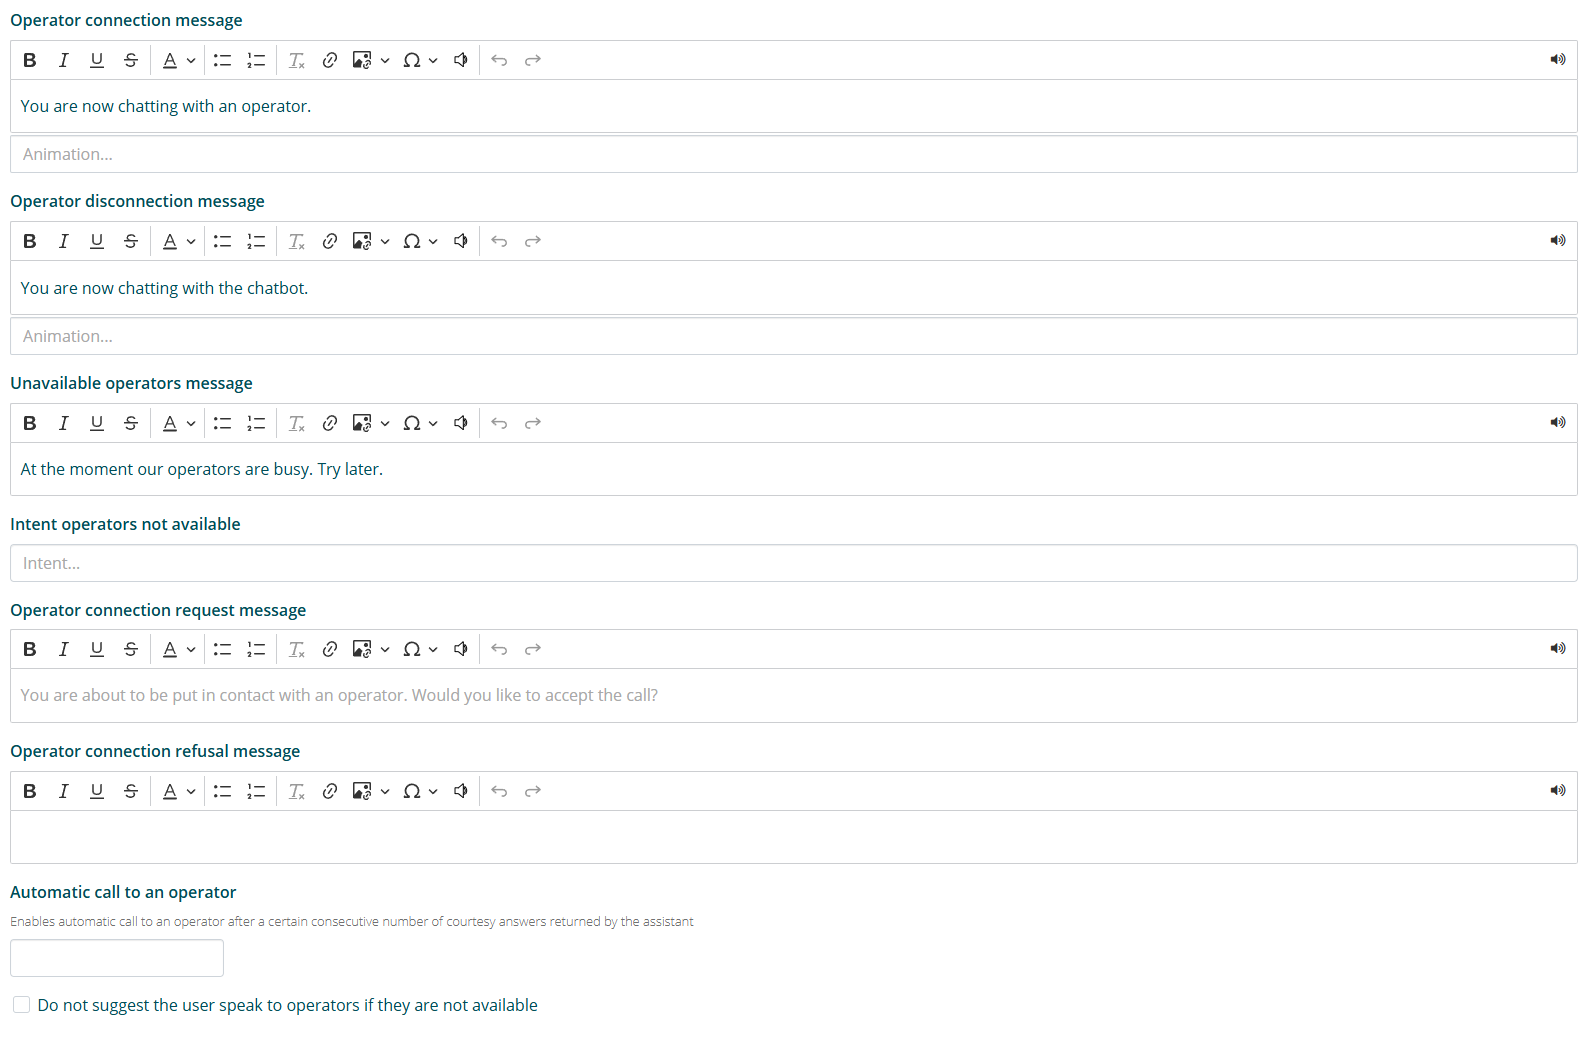
"Operator connection message" is the message that will be displayed to the user when a Live Chat with an operator is started.
"Operator disconnection message" is the message that will be displayed to the user when a Live Chat is concluded. From this moment on, the user will interact with the virtual assistant.
"Operators unavailable message" is the message that will be displayed to the user when there are no operators available to start a Live Chat.
"Operator connection request message" is the message that will be displayed to the user when they are offered to start a Live Chat with an operator. Following this message, the "Accept" and "Decline" options will be offered.
"Operator connection decline message" is the message that will be displayed to the user if they decline to start a Live Chat with an operator.
The "automatic call to an operator" function allows you to enable automatic calling of an operator after a certain consecutive number of courtesy responses returned by the assistant.
Within the "Call to action" section you can enable the option for the user to start a Live Chat with an operator by clicking on the appropriate icon.
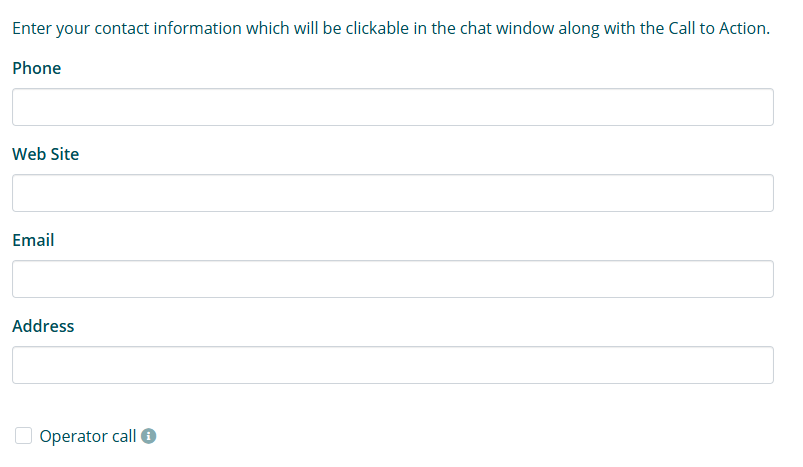
Call to Action
The "call to action" section allows you to customize the contact information that will be clickable in the chat window along with the button to request a Live Chat.
Parameters and Reinforcement
Parameters
The "parameters" section allows you to customize the understanding levels of the virtual assistant based on three parameters.
Proper use of these parameters requires advanced knowledge of how the virtual assistant created with Algho understands language. It is therefore recommended to modify these parameters only after advanced training or after consulting your QuestIT contact.
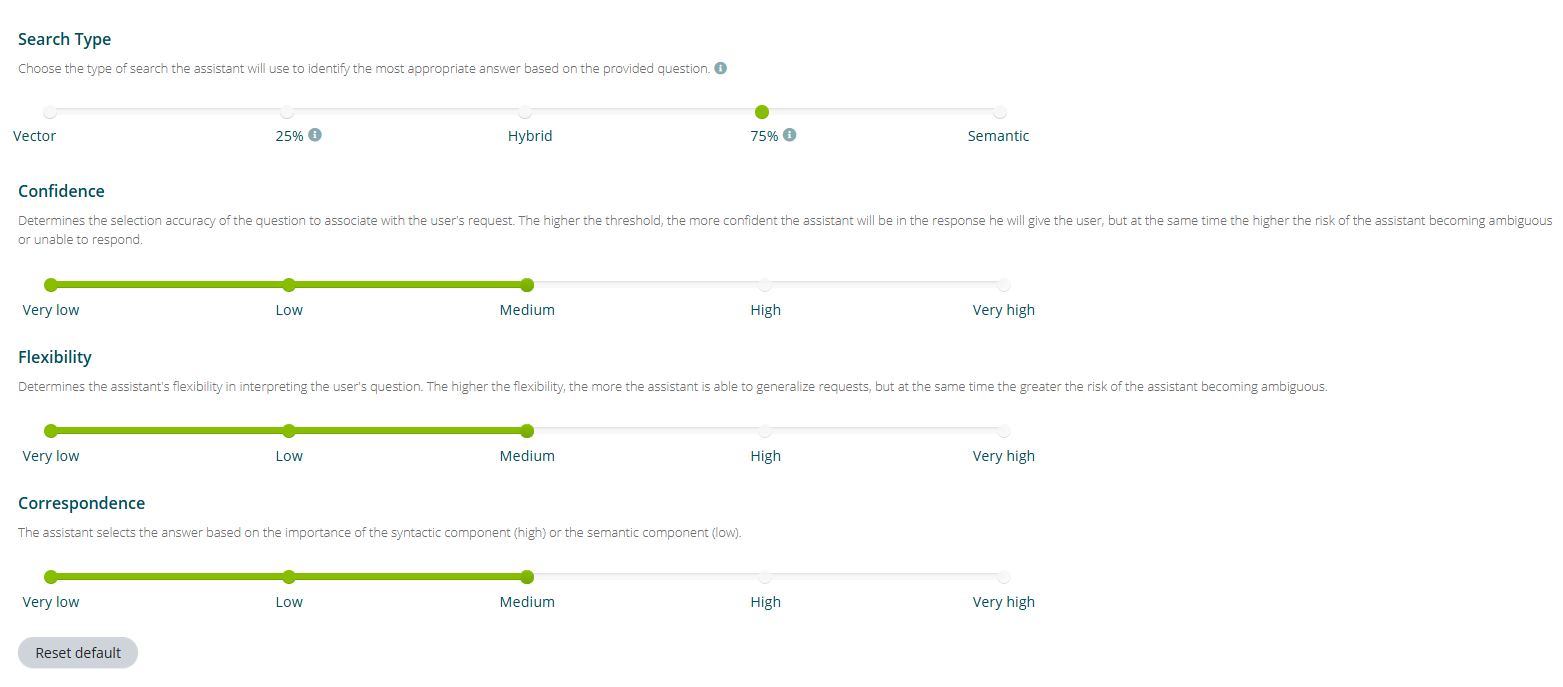
The confidence level determines the accuracy of selecting the question to associate with the user's request. The higher the threshold, the more certain the assistant will be of the answer it gives to the user, but at the same time the higher the risk that the assistant will fall into ambiguity or be unable to answer.
The flexibility level determines the elasticity of the assistant in interpreting the user's question. The higher the flexibility, the more the assistant is able to generalize requests, but at the same time the higher the risk that the assistant will fall into ambiguity.
The correspondence level determines whether the assistant should select the answer to provide based on the importance of the syntactic component (high) or the semantic component (low).
Reinforcement
The "reinforcement" section allows you to enable voting by the end user of the assistant's responses. In this section you can also enable automatic learning.
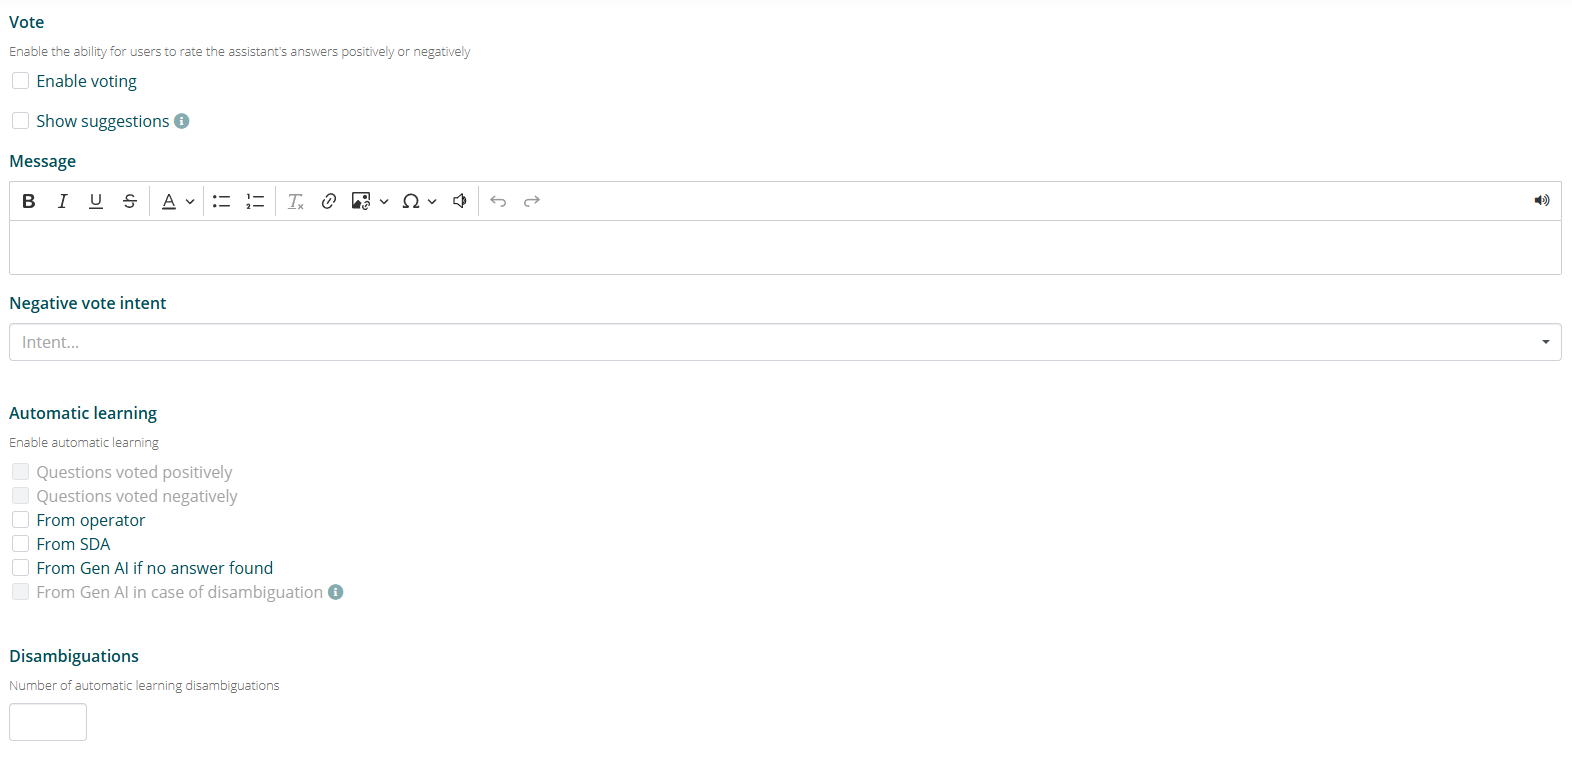
The "enable voting" option allows end users to vote, positively or negatively, on the virtual assistant's responses. The voted responses are then displayed in the "Reinforcement" section.
The "show suggestions" option allows the assistant to propose automatic suggestions in case the user rates the response negatively. The text box below allows you to customize the text that precedes the suggestions.
The "automatic learning" section allows you to enable some types of automatic learning:
- learning from "positively voted questions" ensures that every time a user votes a response positively, the user's question that triggered that response is added to the knowledge base linked to the positively voted response;
- learning from "negatively voted questions" (available only if "show suggestions" is active) ensures that every time a user votes a response negatively and chooses one of the suggestions proposed by the assistant, the user's question that triggered the negatively voted response is added to the knowledge base linked to the suggestion response chosen by the user;
- learning "from operator" allows a live chat operator to add a question and answer to the knowledge base directly during a live chat session.
The "disambiguations" section allows you to enable automatic learning from the suggestions chosen by users among those proposed by the assistant in case of disambiguation. You can set after how many selections a question should be added to the knowledge base.
Banners and Commands
Banner
This action is only available for accounts with Kiosk functionality.
The "banner" section allows you to enable and configure the display of advertising banners in the Kiosk interface.
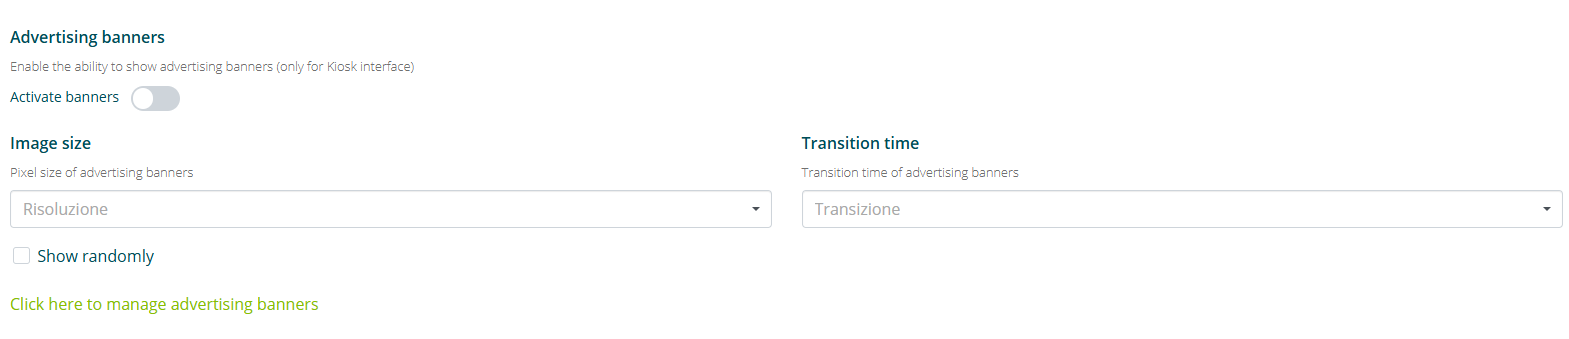
In this section you can set the pixel dimensions of the advertising banners to display and the transition time from one banner to another.
Commands
The "commands" section allows you to enable the activation of specific commands after a certain number of interactions between the user and the virtual assistant.
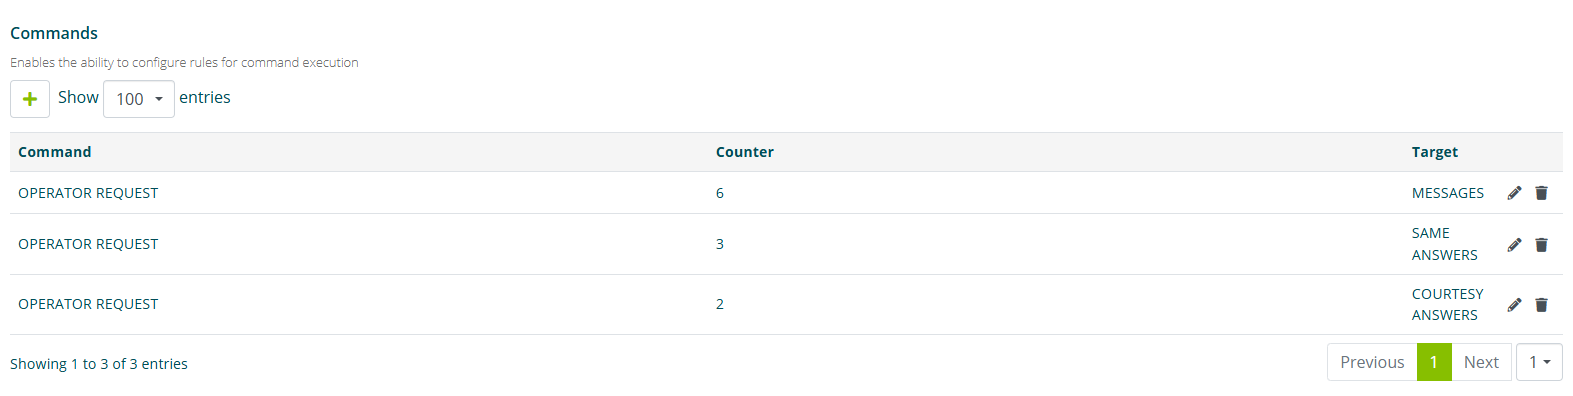
By selecting the "Add" (+) option you access the settings screen.
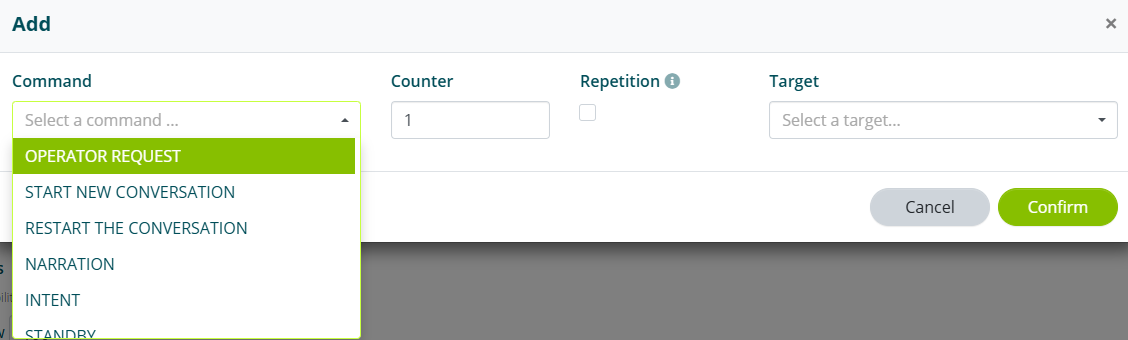
You can set the following as commands:
- "OPERATOR REQUEST";
- "STOP CONVERSATION";
- "NARRATION".
You can set the commands after a certain number of:
- "MESSAGES" (i.e. any type of message sent by the user);
- "IDENTICAL RESPONSES" (i.e. identical responses sent by the assistant);
- "COURTESY RESPONSES".